
Black forest cake is very popular among different set of individual. Nowadays, most people make use of black and white forest cakes for parties and functions; this can either be a wedding or birthday party. Several people out there think that it is very difficult to make the cake at home but this is far from true. Below is an easy, simple as well as stepwise approach to making black forest cake so that you can enjoy it at home anytime you desire.
Sponge: Add salt to a cooker and make use of an idli cooker or a normal one without whistle. You can then keep a rack, cover and then apply heat in low flame.
Take a bowl and add butter in room temperature, beat it. Then add cream and sugar until it is fluffy and light. After two or three minutes, you can then add the required quantity of condensed milk and whisk for 3-5 mins.
Take a sieve and sift in the flour, cocoa, baking powder as well as baking soda. Fold the flour into the wet ingredient with the aid of spoon or spatula. Then add hot water or milk so as to make a consistent smooth dropping.
Apply butter to the cake tin to about 6 or 7 inches depending on the required height or aluminum container of such diameter. Then place a butter paper in the bottom and against the butter so as to have a smooth as well as perfect cake.
Pre-heat the cooker and keep the tin inside, ensure it is covered and the flame is low. Bake the content for 25-30 minutes, check after 25 minutes with a toothpick so as to determine if it’s ready. If the toothpick comes out clean, then the cake is ready but if it doesn’t you can leave it for another 5 minutes so as to bake fully.
After the cake is done, you should take it out and let it cool for 10 minutes. Loosen the sides with a knife and transfer the cake into a plate then a cooking rack. Chocolate Sponge is ready.
Icing: Chill a stainless steel bowl and wire whisk in freezer for a duration of 15-30 minutes. You likewise need to ensure the cream is chilled. Add the chilled cream, powdered sugar as well as vanilla to the chilled bowl and whisk till it is very soft. Then transfer the cream into a refrigerator for another 15-20 minutes and then beat for 5 minutes or until it is very stiff. Whipped Cream is ready!
Filling: Take the cherries and crush them lightly so as to get the seed
Syrup: Take out the syrup from cherry tins, add sugar to it and heat until the sugar melts, and ensure you do not overheat.
Shavings: Take dark compound chocolate bar and peel it with a peeler! After peeling, freeze for 10 minutes or more so that they stiff, this will make it easy for you to crush and also apply.
The Assembling: Take 3-5 bowls and keep a plate over it, or turn the table horizontally to cut cake into three layers. You can then transfer the layers to a plate. Touch the turn table with cream so as to ensure safe decoration and add the bottom sponge layer to it.
Spread 3-4 tablespoon of syrup to it. Spread a reasonable quantity of cream on it. Then some cherries. Syrup, cream and cherries can then be added to the middle layer. Now the final layer, keep it upside down and then spread syrup. Take a big dollop of stiff cream and then spread it on top as well as sides of the cake. Then make it smooth, if crumbs are seen, do crumbs coat so as to cover them.
Keep the cake in the freezer for a maximum duration of 10 minutes. This would make it easy to transfer to serving base. Transfer the cake base with the aid of palette knife and ensure care is taken when doing this. You can then add the remaining cream to a piping bag fitted with a star nozzle.
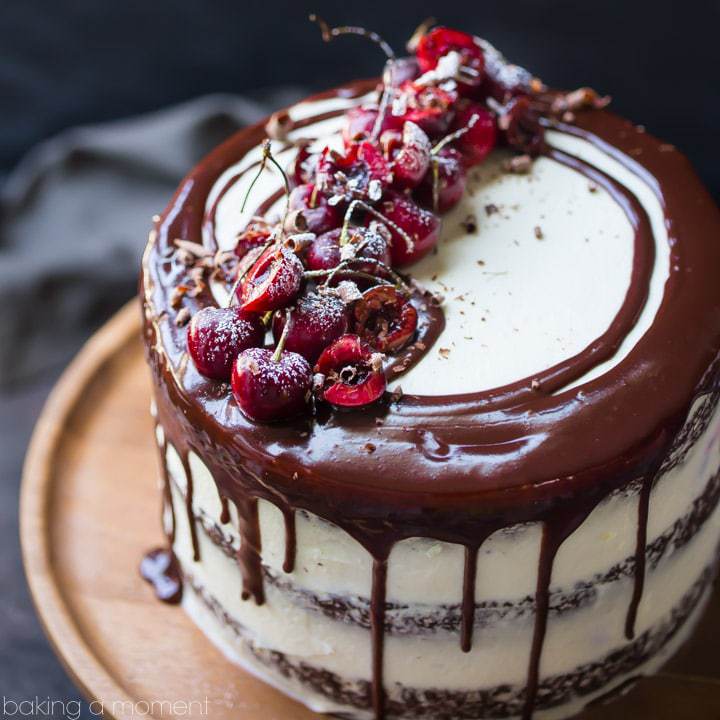
Sprinkle chocolate shavings all over the sides and top, a cherry can also be spread on top of each rosette if you desire. Once these are done, the black forest cake is ready for consumption. Check Cuckoo Forest for more recipes.